Set up a charger with the QR label
Scan the setup label on the components cabinet with the Veton app, enter the setup PIN printed next to it and walk through the eight steps of the app wizard to commission and claim the charger.
Ce guide n'est pas encore traduit dans votre langue. Vous le lisez en anglais.
Before you start
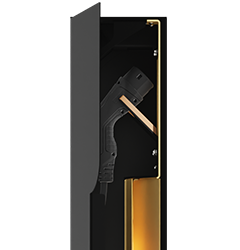
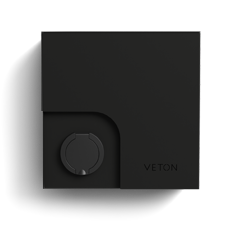
Every Veton charger ships with a setup label on the outside of its components cabinet. It carries a QR code and, next to it, a setup PIN of 8 characters.
- The QR code is a link. It opens the setup for this one charger.
- The PIN shows that you have the label in front of you. The app asks for it before the setup starts.
- The charger must be powered and connected to the internet, wired or by the network your installer prepared.
- This guide describes the wizard in the Veton app: eight steps. Without the app, the same QR code opens a web wizard in your browser with nine steps and a slightly different order. That path has its own guide.
Set up a charger from the QR label without the app
Do not share a photo of the setup label: with the QR code and the setup PIN, someone can add the charger to their account.
Scan the label
- Open the camera on your phone and point it at the QR code.
- Tap the link that appears. It starts with v2.vetoncontrol.com.
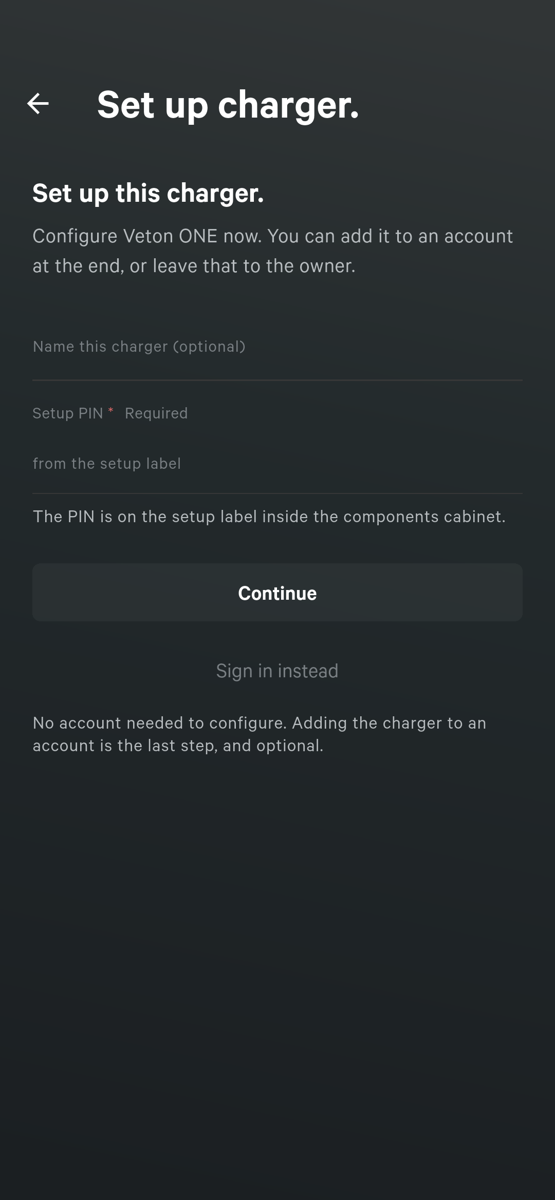
- With the Veton app installed, the app opens straight away on the Set up charger screen. Without the app, the web wizard opens in your browser.
- The screen shows the charger model. Under Name this charger you can give it a name you will recognise, for example Garage or Parking 2.
- Type the Setup PIN from the label and tap Continue.
The setup PIN has 8 characters, digits and capital letters. Spaces, hyphens and lowercase letters are fine. The codes never use O, I or L: an O counts as 0, an I or L as 1.
When a code is refused, compare each character with the label: B and 8, S and 5, Z and 2 look alike. After 5 refused codes, adding with the setup PIN is paused for 15 minutes. After 25 in total it stays locked until your installer, if the charger is linked to their company, or Veton support adds the charger for you. Removed the charger from your own account in the last 30 days? You can add it back without the code on the web: sign in at v2.vetoncontrol.com with the same account as in the app and open Recently removed on the Chargers page.
Set up a charger from the QR label without the app
No account is needed to configure the charger. If you are signed in to the app, the charger is linked to your account when you finish. If you are not signed in, the setup still runs and you can link the charger at the end. If the screen says the charger is already linked to an account, tap Sign in instead and sign in with the account that owns it.
The eight setup steps
The wizard is titled Commission charger and shows Step 1 of 8 to Step 8 of 8. Each step has a Next button and a Finish later link. You can stop at any point and pick the setup up again later from the same QR code.
Step 1 of 8: connecting to your charger
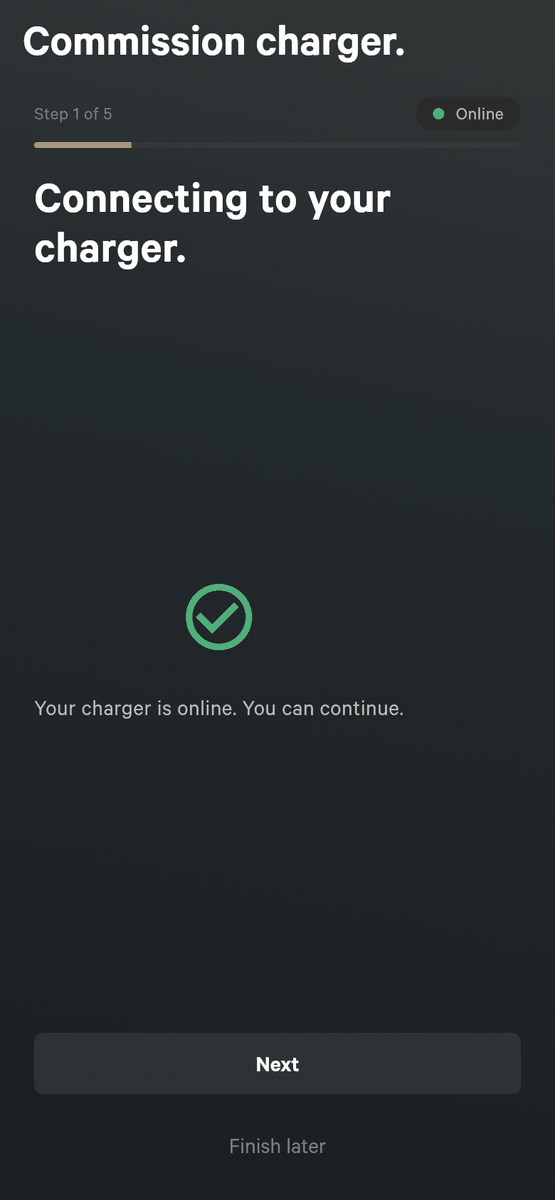
The app waits until the charger reports in. A green tick and the text Your charger is online. You can continue. means you can go on.
- While the charger is still booting the app says Your charger is starting up, this can take a few minutes. Leave it powered.
- If it stays offline the app asks: is the charger powered on, and is the network cable plugged in or Wi-Fi configured? Check those, then tap Retry, or ask your installer to check the network settings.
Step 2 of 8: load management
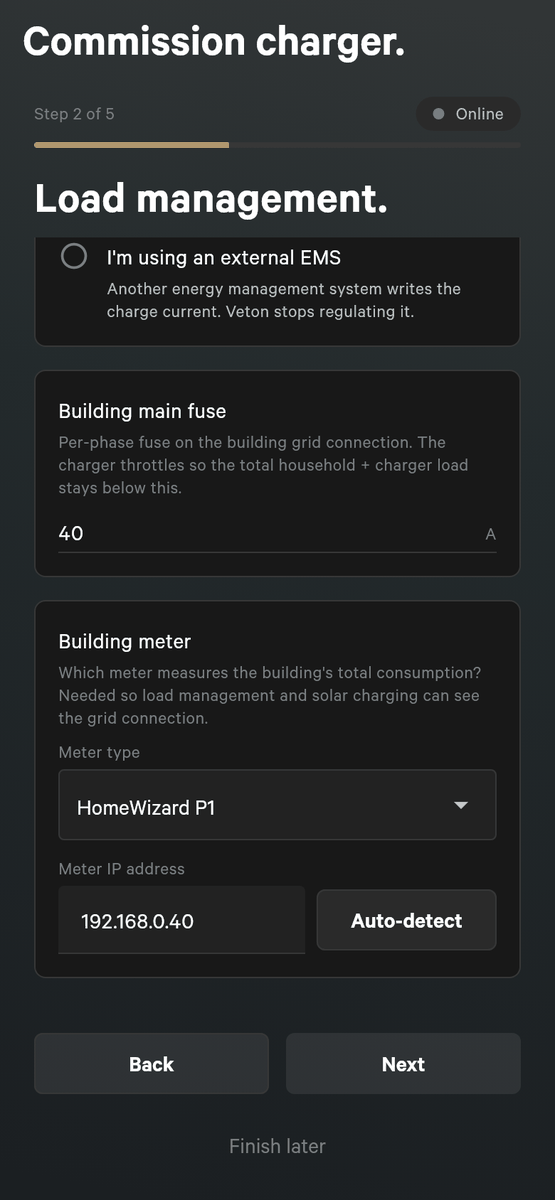
Load management keeps the car from overloading the building. The charger watches what the rest of the building uses and slows the car down when the building is busy.
- Type the Building main fuse in amps. This is the fuse on your grid connection, per phase, between 10 and 1250 A. Your installer knows this value.
- Pick the Building meter: the meter that measures the whole building. The charger needs it to see how much room is left under the fuse, and to see your solar surplus.
- For a meter on the network, type its IP address or tap Auto-detect to let the app find it.
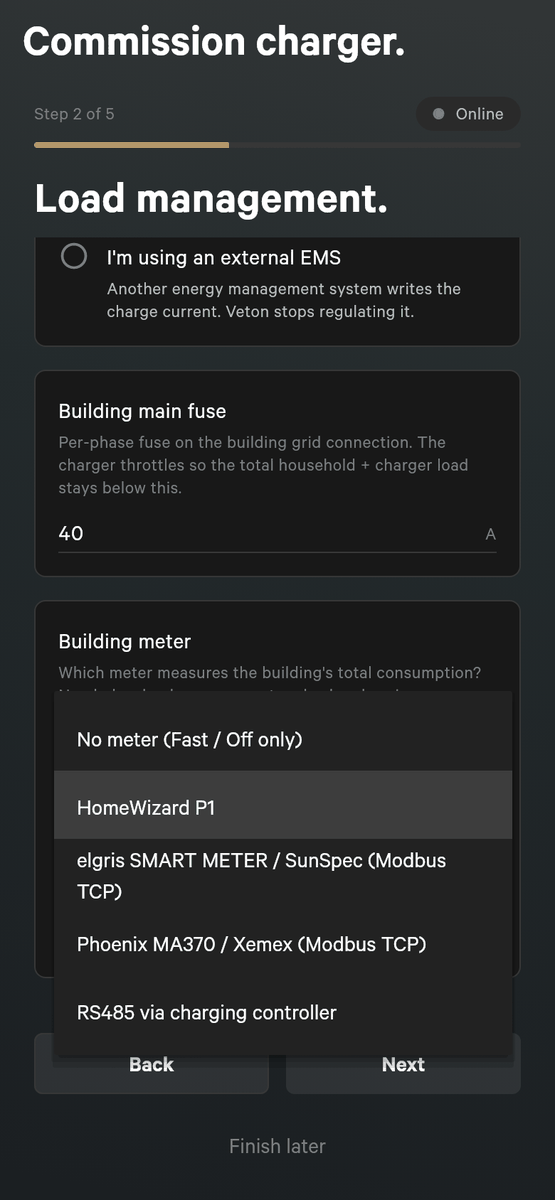
- Choose No meter only when there is no meter to read. Without a meter the charger can only run in Fast and Off. Solar, Smart and Capacity need a meter.
- Choose I'm using an external EMS when another energy management system controls the charge current. Veton then stops regulating it.
Step 3 of 8: test the installation
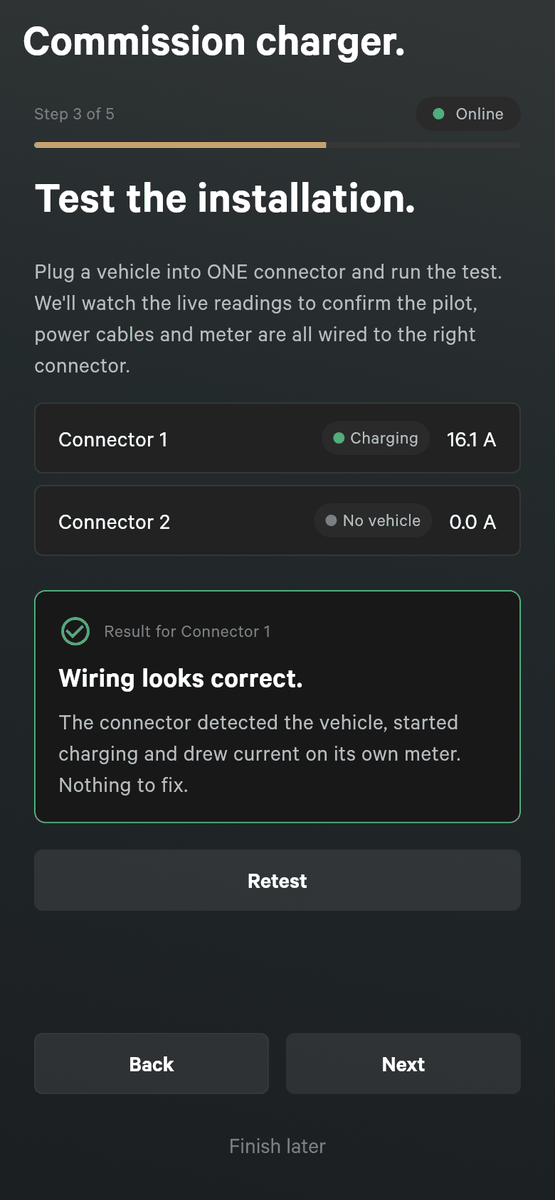
This step checks that each connector is wired to the right cables and meter.
- Plug a car into one connector only and tap Run test.
- The app watches the live readings for a short while and shows Testing, keep the vehicle plugged in.
- Read the result. Wiring looks correct. means nothing to fix. A warning names the connector and what it noticed, for example a car detected on one connector while the current flows on another.
- Tap Retest after a fix, or plug the car into the other connector to test that one. Skip test is there if you cannot plug in a car right now.
The test warns but never blocks. You can continue and correct the wiring later, but a warning here usually means a car will not charge until it is fixed.
Step 4 of 8: authorization
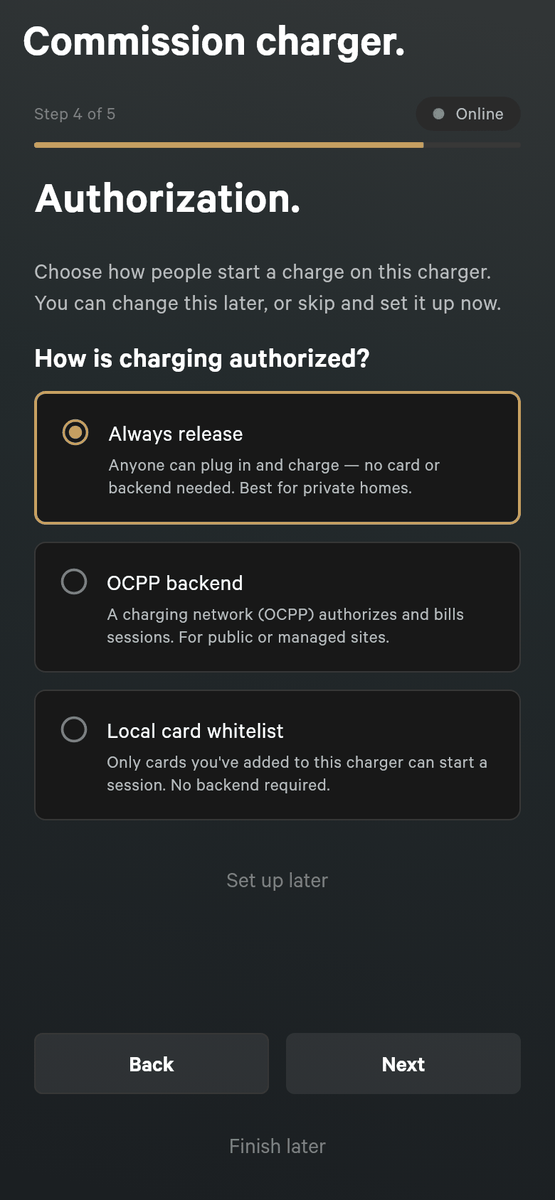
Choose who may start a charge on this charger.
- Always release: anyone who plugs in can charge. No card, no backend. Best for a private home. This is the default.
- OCPP backend: a charging network authorizes and bills each session. Pick the backend from the list. The charger restarts its connection briefly. Use this for public or managed sites.
- Local card whitelist: only cards you add to this charger can start a session. No backend needed. The next screen lets you add cards by holding them to the reader. In Installer Settings this same option is called RFID whitelist.
You can tap Set up later and change this at any time from Installer Settings in the app.
Steps 5 to 7: address, price and solar panels
The next three steps are optional. Each one has its own Skip for now: skipping one never skips another, and a skipped step leaves what the charger already has. Smart charging works best with all three filled in. If you are not signed in, the setup PIN is enough to save them.
Step 5 of 8: address
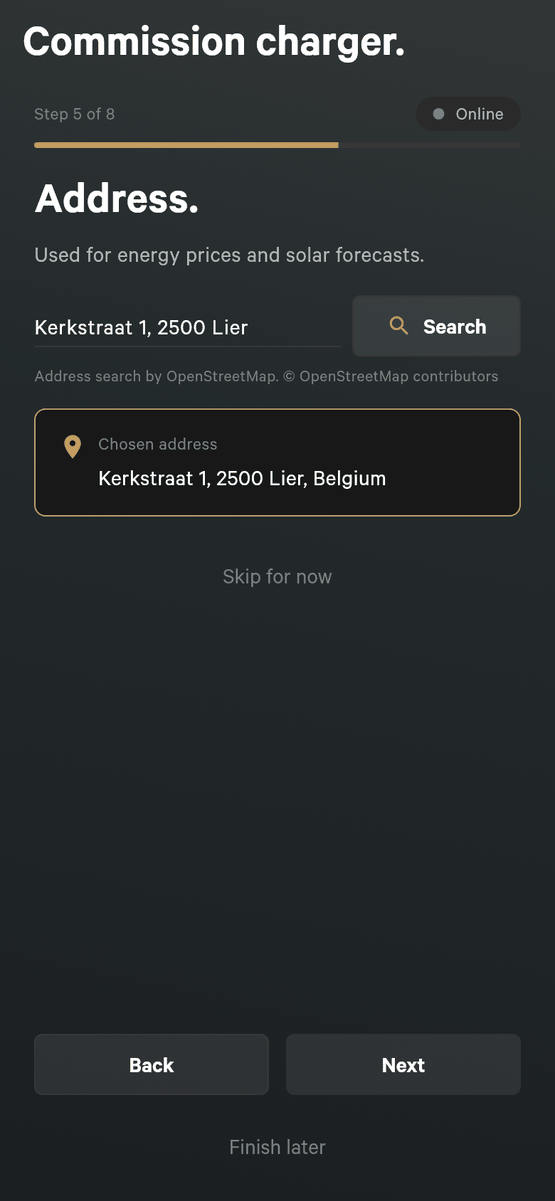
The address is used for energy prices and solar forecasts.
- Type your address and tap Search.
- Pick your address from the list. The search runs on OpenStreetMap. The app does not ask for your phone's location.
If the charger already has an address, the step says Address already set. Tap Change to replace it, or Next to keep it.
Step 6 of 8: electricity price
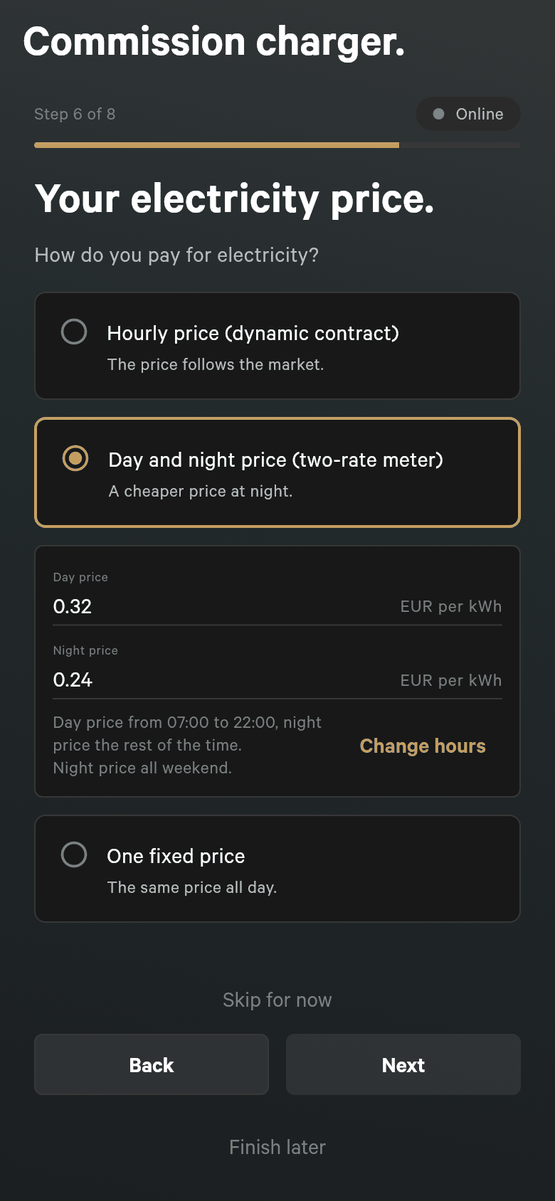
Answer How do you pay for electricity?
- Hourly price (dynamic contract): the price follows the market. There is nothing to type.
- Day and night price (two-rate meter): type the Day price and the Night price. The day price runs from 07:00 to 22:00 and the whole weekend counts as night. Tap Change hours for other hours.
- One fixed price: type the Price.
Prices are in EUR per kWh, for example 0.30. A comma or a point both work. A price must be above 0 and at most 2 EUR per kWh.
Step 7 of 8: solar panels
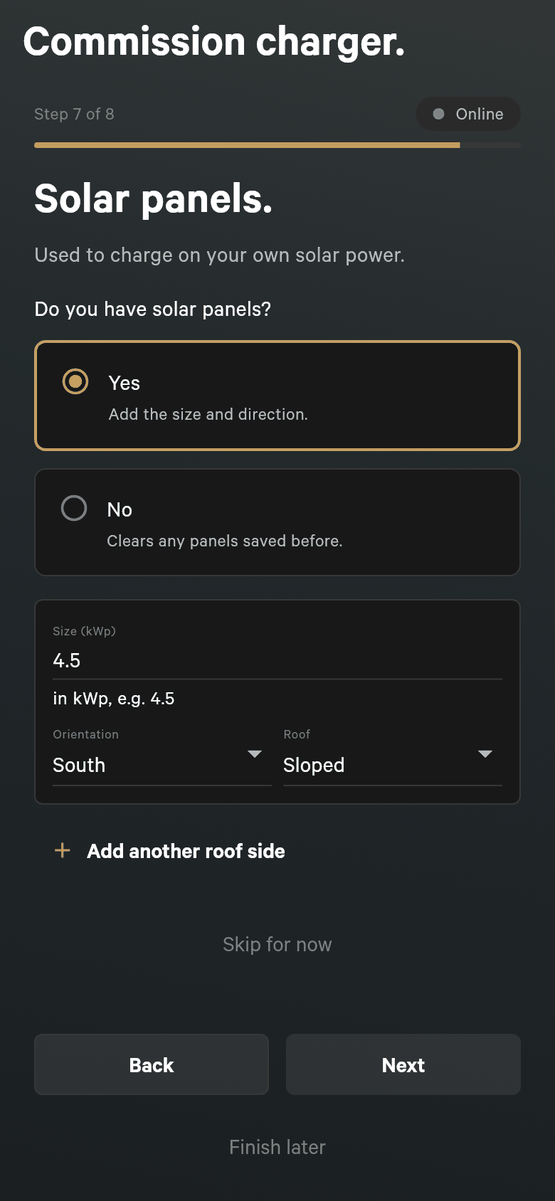
Answer Do you have solar panels?
- No: the charger has no panels. Panels saved before are cleared.
- Yes: fill in one row per roof side. Size in kWp, for example 4.5 (not 4500); the Orientation, the direction the panels face, which you must choose; and the Roof, Sloped or Flat. Tap Add another roof side for a second direction, up to 4 roof sides.
Step 8 of 8: setup complete
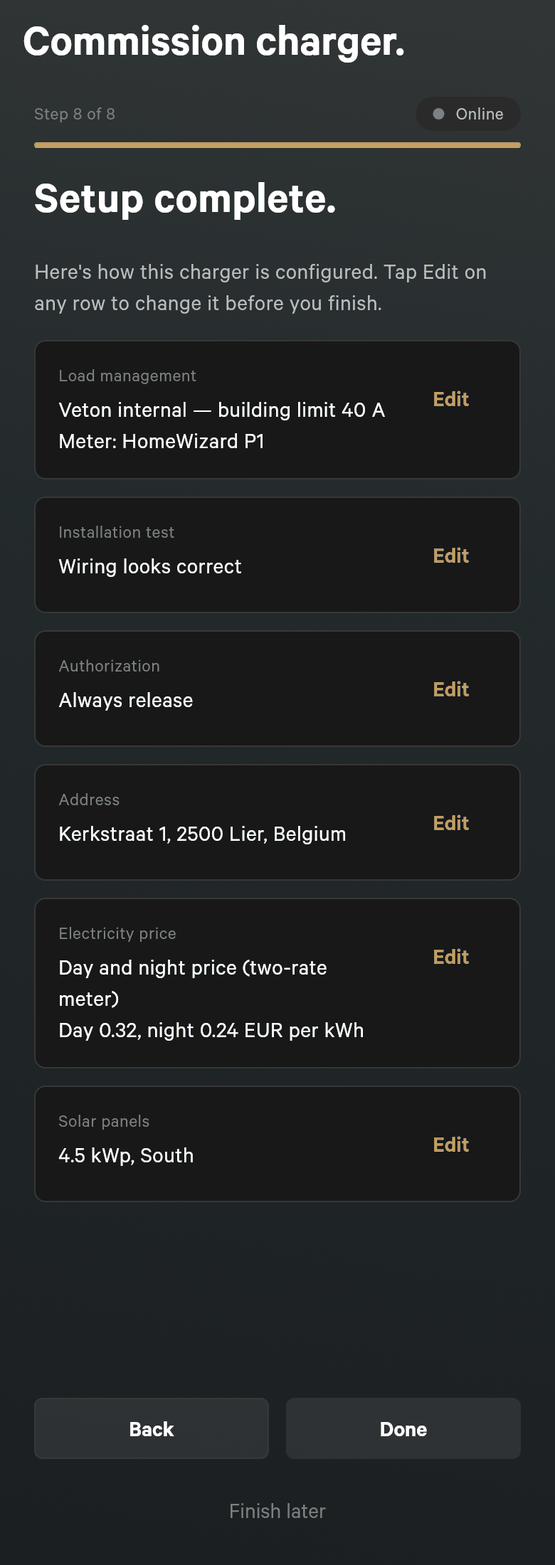
The last step shows every choice in plain words: load management, the installation test, authorization, address, electricity price and solar panels. An optional step you skipped shows what the charger already had (for the address: Set), or Not set if there was nothing yet. Tap Edit on a row to open that step; its Next, or Skip for now, brings you straight back to this summary. Tap Done to finish.
What claiming means
When you finish while signed in, the charger is claimed. It belongs to your account from now on.
- The charger appears in the app on every phone where you sign in.
- It also appears at v2.vetoncontrol.com, where you see the same live status and history in a browser.
- While it is in your account, another customer can only take it over with the setup PIN from the label.
- To hand it over, for example when you move house, open Settings, Manage Chargers in the app and tap Delete charger. That removes the charger from your account, and the people in your location lose access too. An installer company linked to the charger itself stays linked.
- Removed it by mistake? For 30 days you can add it back without the setup PIN under Recently removed on the Chargers page at v2.vetoncontrol.com. Sign in there with the same account you use in the app. This works for customer accounts. After 30 days you need the setup PIN from the label.
If you ran the setup without signing in, the last step offers Claim this charger. Sign in or create an account and the charger is linked to you. You can also do this later by scanning the QR code again.
Open the Veton portal in your browser S’ouvre sur un autre site
Back to: getting started with the Veton app
Something not working? Ask your installer first. You can also reach Veton through the contact page.